Loading...
![]()
Designing with CSS
Styling your page content
CSS With Grumpy Cat
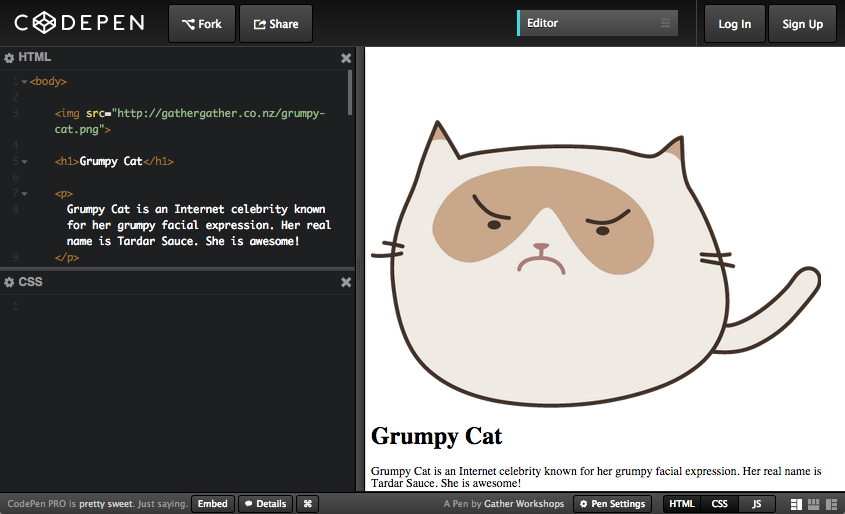
Open this link in a new tab: Grumpy Cat Code
Keep it open! We are going to be using CSS
to make it look way better.
CodePen Editor
CodePen can show us both our HTML and our CSS:
Grumpy Cat Example
Next we will use code to make our output look something like this:
Grumpy Cat Example
Classes
To make our page look pretty, first we create a CSS class with a unique name.
In your CSS panel:
.profile-pic {
  width: 200px;
}
We just created a class called profile-pic.
This class can change the width of something on our page to be 200px.
Applying Classes
Find the first image tag in the HTML panel,
and apply the profile-pic class to it.
Find this line your HTML panel:
<img src="http://gathergather.co.nz/grumpy-cat.png">
And change it to:
<img class="profile-pic" src="http://gathergather.co.nz/grumpy-cat.png">
Cartoon Grumpy Cat should now be much smaller.
Font Styles
There are many font options in CSS. We can create another class to try them out.
In your CSS panel, on a new line:
.page-title {
  font-family: "Comic Sans MS";
  font-size: 50px;
  text-align: center;
  text-shadow: 5px 5px 5px rgba(0,0,0,0.5);
}
In your HTML, find the h1 and apply the class:
<h1 class="page-title">Grumpy Cat</h1>
Block Elements
Block elements are the "building blocks" of our website.
Block elements are used for layout, and can contain other elements.
Header HTML
Our header block will contain the profile pic, "Grumpy Cat" heading and the first paragraph of text.
In your HTML, on the line before the profile pic:
<header class="page-header">
In your HTML, after the first paragraph:
</header>
There should now be a dark blue box at the top of your page.
Header Styles
Let's design a header to contain Grumpy Cat's profile pic, page title, and first paragraph.
In your CSS, on a new line:
.page-header {
  background-color: darkblue;
  color: white;
  font-size: 22px;
  font-weight: bold;
  text-align: center;
}
Our header block will have large, centered, bold text.
Info Section HTML
This content block is a section not a header, so we use the section tag.
In your HTML, before the second paragraph:
<section class="info-section">
And after the third paragraph:
</section>
There should now be a yellow block around two paragraphs.
Info Section Styles
Now we want a box around the other two paragraphs.
In your CSS, on a new line:
.info-section {
  background-color: yellow;
  padding: 20px;
  margin-top: 30px;
  margin-bottom: 30px;
}
Gallery Section HTML
Now create the section block around your gallery images.
In your HTML, before the first gallery image:
<section class="gallery-section">
And after the last gallery image:
</section>
You should now have a dark green section around your gallery images.
Gallery Section Styles
We can style our gallery section the same way.
In your CSS:
.gallery-section {
  background-color: darkgreen;
  text-align: center;
}
Then in your HTML code, add section tags around your gallery images. Remember to add the class!
If you can't remember how, there is code on the next page...
Gallery Image Styles
We can also use a trick to style the images inside the gallery section, without adding a class to every single one.
In your CSS, on a new line:
.gallery-section img {
  border: 5px solid white;
  height: 150px;
}
Your gallery images should now have white borders and all be the same height.
Element Selectors
Rather than always using classes, we can also choose to style all HTML elements of the same type.
At the top of your CSS, on a new line:
header,
section {
  width: 700px;
  margin-left: auto;
  margin-right: auto;
  line-height: 130%;
}
All your sections (and your header) should now be centered on the page.
Whole Page Styles
When we have styles we want to apply to the whole page, we can target the body, because all other tags are between the body tags.
At the top of your CSS, on a new line:
body {
  background-color: gold;
  background-image: url(http://subtlepatterns.com/patterns/food.png);
  font-family: sans-serif;
}
Your background should now be yellow with a pattern.
Element Selectors
Now all that we have to do is tidy up our colours. We need to remove the backgrounds we used for planning our layout.
In your CSS:
- Find
.page-headerand remove the background - Find
.info-sectionand change background to white - Find
.gallery-sectionand remove the background
Grumpy Cat Output
Your own output window should now look like this:
If it doesn't, check that all your styles are correct!
Challenge
Design your own "Breaking News" item:
- Go to nzherald.co.nz
- Right click on the main story heading and 'Inspect Element'
- Edit the headline to make your own news!
Try these too:
- Modify the paragraph text to match your headline
- Change the image source to link to a different image
- Take a screenshot!
HTML vs CSS
What are the differences?